

There was some fear that Home windows 10 gathers an excessive amount of non-public data from customers. Whether or not you suppose Microsoft’s running gadget crosses the privateness line or simply need to you’ll want to safeguard as a lot of your individual lifestyles as imaginable, we are right here to assist. Here is how to offer protection to your privateness in only a few mins.
Word: This tale has been up to date for Home windows 10 model 22H2. When you have an previous unlock of Home windows 10, some issues is also other.
Flip off advert monitoring
On the best of many of us’s privateness issues is what information is being accrued about them as they browse the internet. That data creates a profile of an individual’s pursuits this is utilized by a lot of firms to focus on advertisements.
Home windows 10 does this with using an advertising ID. The ID does not simply accumulate details about you whilst you browse the internet, but additionally whilst you use Home windows 10 apps. Your promoting ID isn’t synced to different computer systems, and it operates independently of your Microsoft account, in case you’re the usage of one.
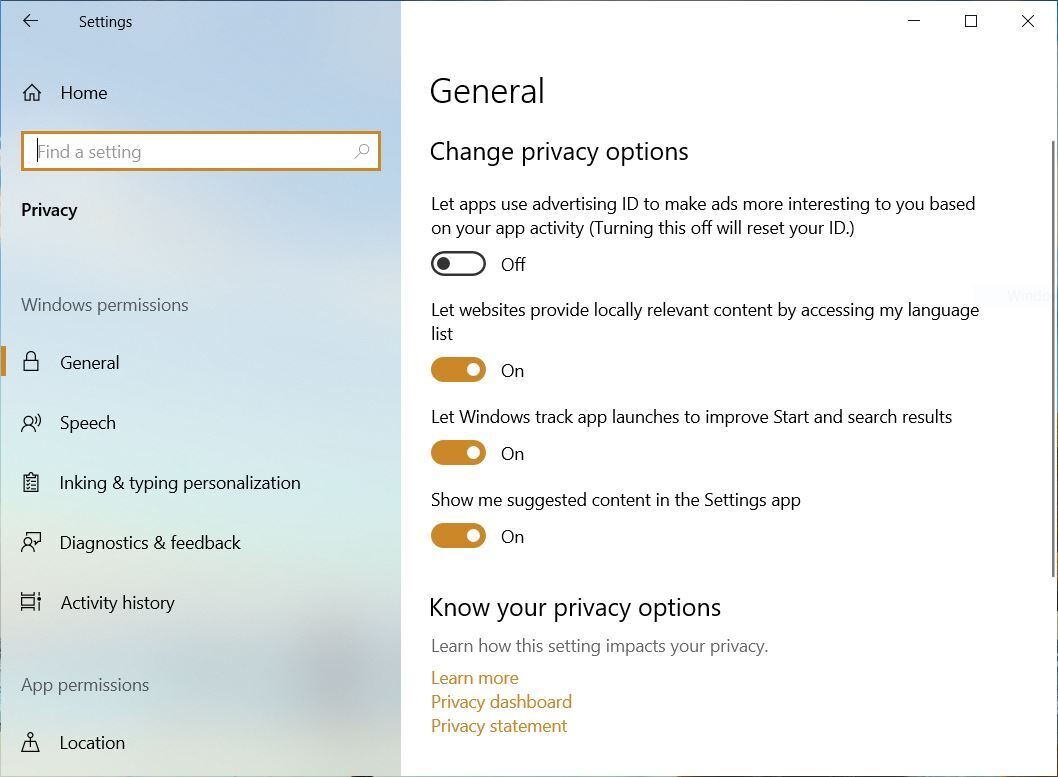
You’ll flip that promoting ID off if you wish to have. Release the Home windows 10 Settings app (through clicking at the Get started button on the decrease left nook of your display after which clicking the Settings icon, which seems like a tools) and move to Privateness. You will have to see “Common” highlighted at the left. At the Common pane in the primary window, you’ll be able to see a listing of possible choices underneath the name “Trade privateness choices.” The primary controls the promoting ID.
 IDG
IDGYou’ll flip off Home windows 10’s promoting ID if you wish to have. (Click on symbol to amplify it.)
Transfer the slider from Directly to Off. You’ll be able to nonetheless get advertisements brought to you, however they are going to be generic ones moderately than centered ones, and your pursuits may not be tracked.
To make completely certain you are no longer tracked on-line whilst you use Home windows 10, and to show off some other tactics Microsoft will use details about you to focus on advertisements, head to the Ad Settings section of Microsoft’s Privacy Dashboard. Signal into your Microsoft account on the best proper of the web page.
Then move to the “See advertisements that pastime you” segment on the best of the web page and transfer the slider from Directly to Off.
Flip off location monitoring
Anyplace you move, Home windows 10 is aware of you are there. Some other folks do not thoughts this, as it is helping the running gadget come up with related data, reminiscent of your native climate, what eating places are close by and so forth. But when you do not want Home windows 10 to trace your location, you’ll be able to inform it to prevent.
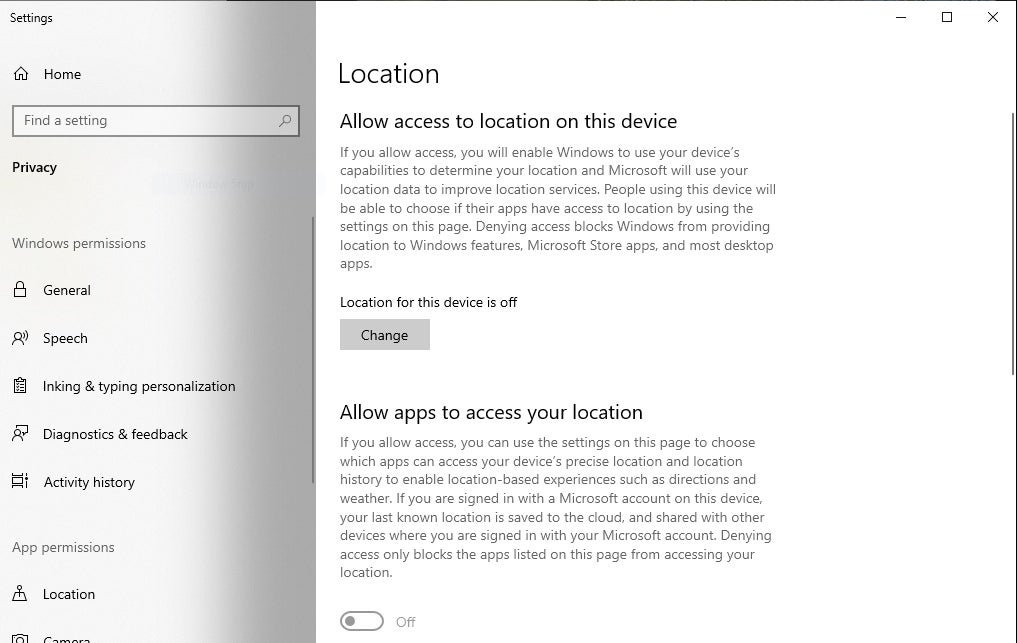
Release the Settings app and move to Privateness > Location. Beneath “Permit get right of entry to to location in this instrument,” click on Trade and, at the display that looks, transfer the slider from Directly to Off. Doing that turns off all location monitoring for each and every consumer at the PC.
 IDG
IDGClicking the Trade button means that you can flip location monitoring on or off for each and every consumer at the Home windows 10 instrument. (Click on symbol to amplify it.)
This does not must be all-or-nothing affair — you’ll be able to flip off location monitoring on an app-by-app foundation. If you wish to have your location for use just for some apps and no longer others, be certain that location monitoring is grew to become on, then scroll all the way down to the “Make a selection which apps can use your actual location” segment. You’ll be able to see a listing of each and every Home windows 10 app that may use your location. Transfer the slider to On for the apps you wish to have to permit to make use of your location — as an example, Climate or Maps — and to Off for the apps you do not.
That doesn’t quilt desktop apps, although. So after you activate location monitoring, move to “Permit desktop apps to get right of entry to your location” and switch the slider to On. While you do this, a listing of desktop apps that use location monitoring seems. Transfer the slider to On for each and every of the apps you wish to have to make use of your location and Off for each and every app you don’t.
While you flip off location monitoring, Home windows 10 will nonetheless stay a file of your previous location historical past. To transparent your location historical past, move to the Privacy Dashboard, scroll all the way down to the Location Task segment, click on View and Transparent Location Task, and delete all or a few of your location historical past.
There may be much more you’ll be able to do to offer protection to your privateness when you are there. For main points, see “Use Microsoft’s Privacy Dashboard” underneath.
Flip off Timeline
Timeline is a Home windows 10 characteristic that permits you to assessment after which resume actions and open information you have got began to your Home windows 10 PC, in addition to some other Home windows PCs and gadgets you’ve gotten. So, as an example, you’ll be able to transfer between a desktop and a computer, and from each and every system resume actions you have got began on both PC.
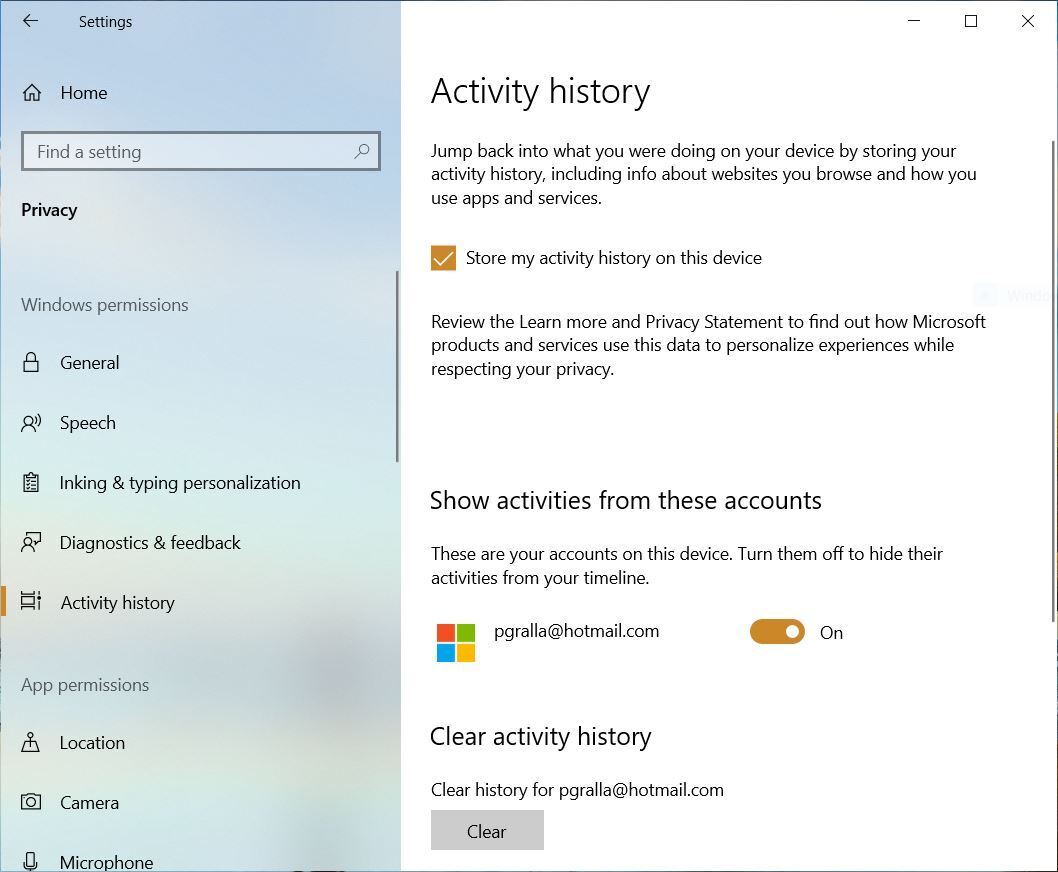
So as to do this, Home windows wishes to assemble details about your entire actions on each and every of your machines. If that worries you, it is simple to show Timeline off. To do it, move to Settings > Privateness > Task historical past and uncheck the field subsequent to Retailer my process historical past in this instrument.
 IDG
IDGHere is how one can flip off Timeline in order that Microsoft does not accumulate details about your actions to your PC. (Click on symbol to amplify it.)
At that time, Home windows 10 now not gathers details about your actions. Then again, it nonetheless helps to keep details about your outdated actions and presentations them on your Timeline on your entire PCs. To eliminate that outdated data, move all the way down to the “Transparent process historical past” segment of the display and click on Transparent.
Word that you will have to take those steps on all your PCs to show off the monitoring of your actions.
Curb Cortana
Cortana is a quite helpful virtual assistant, however there is a tradeoff in the usage of it: To do its process smartly, it wishes to grasp issues about you reminiscent of your house location, workplace, and the days and path you’re taking to trip there. If you are nervous it’ll invade your privateness through doing that, there are some things you’ll be able to do to restrict the guidelines Cortana gathers about you. However there is some data you will have to percentage with Cortana if you wish to use the assistant in any respect.
Get started through opening Cortana settings: Click on the Cortana icon to the best of the Home windows seek field (it is a circle), then click on the three-dot icon within the higher left of the display and make a choice the Settings (tools) icon that looks within the pane. Then click on Privateness. A panel seems that permits you to, to a restricted extent, restrict the guidelines Cortana gathers about you.
 IDG
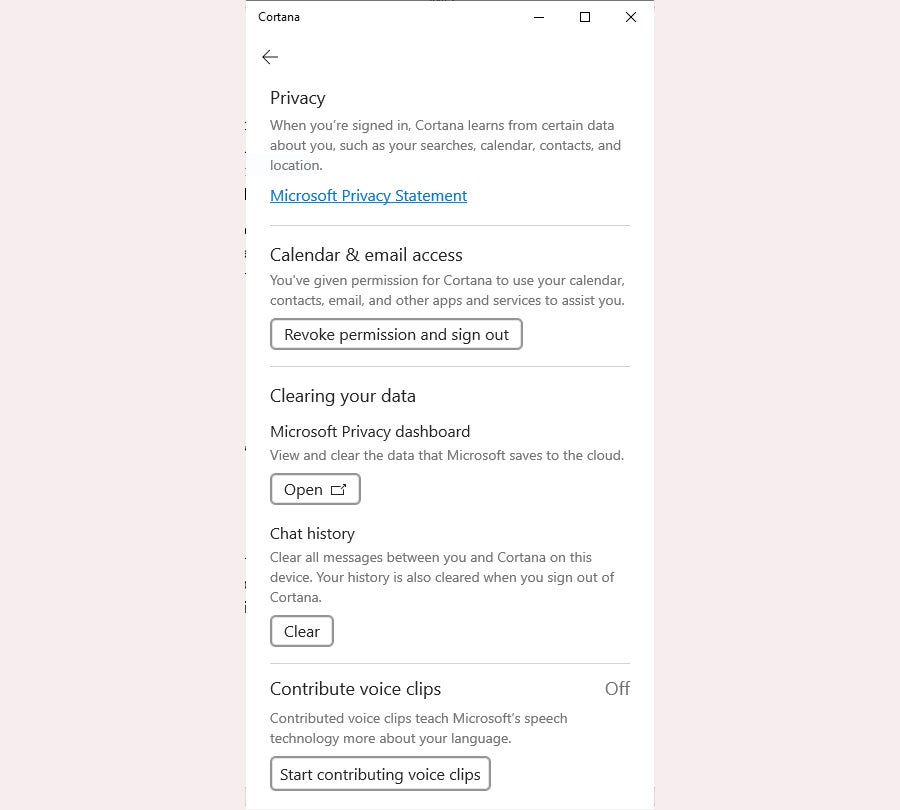
IDGHere is the central location for dealing with privateness in Cortana, however there is no longer so much you’ll be able to do to restrict its privateness accumulating if you wish to proceed to make use of it. (Click on symbol to amplify it.)
Click on Revoke permission and signal out, and you’ll be able to be signed out of Cortana, your chat historical past will probably be cleared, and Cortana may not monitor data reminiscent of your location or attach together with your calendar, e mail, contacts, and different apps and products and services. However you will not be able to make use of Cortana, both. The following time you check in, Cortana will as soon as once more monitor you and hook up with all the ones products and services.
If you happen to best need to transparent your chat historical past however stay signed into Cortana, click on Transparent within the chat historical past segment. Your chat historical past will probably be deleted, however whenever you get started the usage of Cortana, you’ll be able to as soon as once more building up a talk historical past.
Word that the “Microsoft Privateness dashboard” segment of Cortana’s settings is old-fashioned. It brings you to the Microsoft Privateness Dashboard, however the Dashboard now not means that you can transparent Cortana information.
Ditch a Microsoft account for a neighborhood account
While you use your Microsoft account to log into Home windows 10, you are able to sync your settings with all Home windows gadgets. So, as an example, when you’re making adjustments for your settings on a desktop PC, the ones adjustments can also be made to your computer the following time you log in.
However possibly you do not want Microsoft to retailer that details about you. And possibly you wish to have to chop your ties up to imaginable to anything else Microsoft retail outlets about you. If that is the case, your absolute best wager is to prevent the usage of your Microsoft account and as a substitute use a neighborhood account.
To do it, move to Settings > Accounts > Circle of relatives & different customers. Then click on Upload any person else to this PC. From the display that looks, make a choice I wouldn’t have this particular person’s sign-in data. At the subsequent web page, make a choice Upload a consumer and not using a Microsoft account and observe the directions to create and use a neighborhood account.
Remember the fact that whilst you do that, you will not be able to make use of Microsoft’s OneDrive garage or obtain and set up for-pay apps from the Microsoft Retailer. You’ll, then again, obtain and set up unfastened apps from the Microsoft Retailer.
Trade your app permissions
Home windows apps have the prospective to invade your privateness — they may be able to have get right of entry to for your digicam, microphone, location, footage and movies.
However you’ll be able to make a decision, in an excessively granular manner, what sort of get right of entry to each and every app could have.
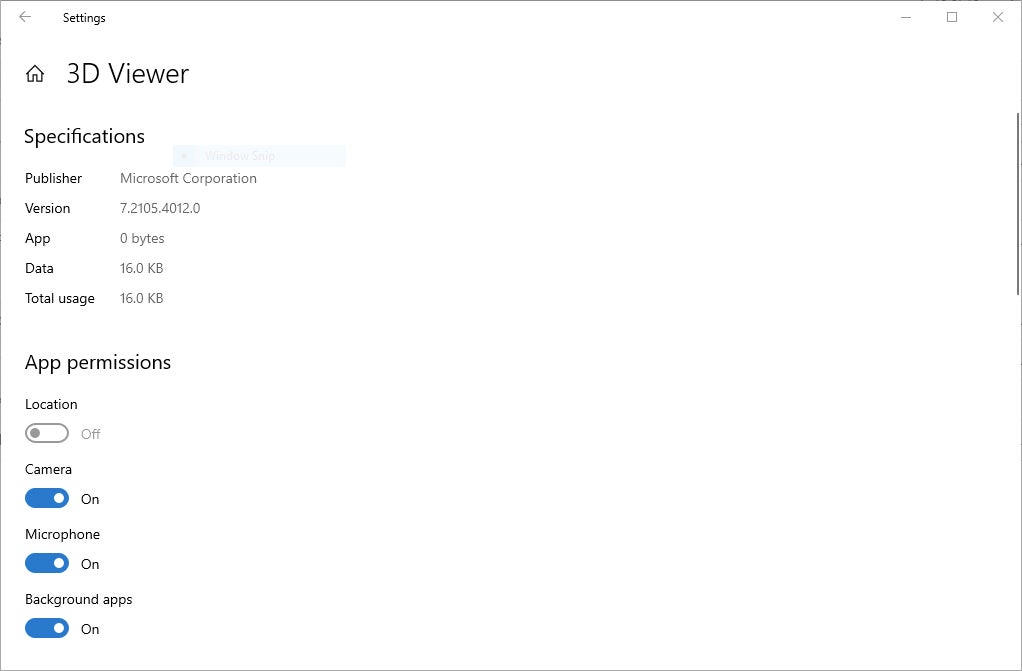
To try this, move to Settings > Apps. Beneath “Apps & options” you’ll be able to see a listing of your put in apps. Click on the app whose permissions you wish to have to keep an eye on, then click on Complicated choices and set the app’s permissions through toggling them both on or off.
 IDG
IDGEnvironment permissions for Microsoft’s 3-D Viewer app. (Click on symbol to amplify it.)
Word, although, that no longer all apps have an “Complicated choices” hyperlink. And of those who do, no longer all assist you to customise your app permissions.
Then again, there is differently to switch app permissions. To do it, move to Settings > Privateness and glance underneath the “App permissions” segment at the left-hand facet of the web page. You’ll be able to see a listing of all of Home windows’ {hardware}, functions and contours that apps can get right of entry to if they are given permission — location, digicam, microphone, notifications, account data, contacts and so forth.
Click on any of the indexed pieces — as an example, Microphone. On the best of the web page that looks, you’ll be able to flip off get right of entry to to the microphone for all apps. Beneath that you’ll be able to see an inventory of the entire apps with get right of entry to to the microphone, the place you’ll be able to keep an eye on get right of entry to on an app-by-app foundation. Any app with get right of entry to has a slider this is set to On. To prevent any app from having get right of entry to, transfer the slider to Off.
Regulate and delete diagnostic information
As you utilize Home windows 10, information is accrued about your {hardware} and what you do whilst you use Home windows. Microsoft says that it collects this information so as to regularly fortify Home windows and to provide you with custom designed recommendation on how one can absolute best use Home windows.
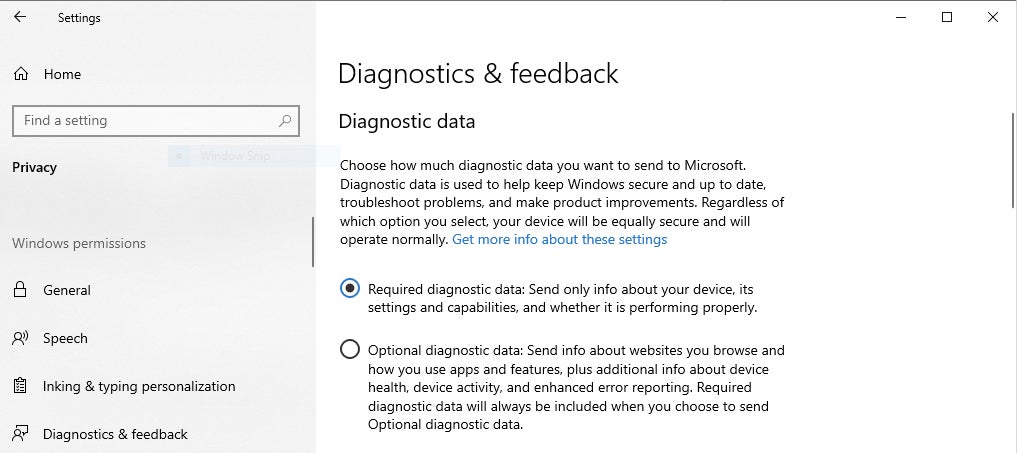
That makes numerous other folks uncomfortable. If you are considered one of them, you’ll be able to to a undeniable extent keep an eye on what sort of diagnostic information is accrued about you. To do it, head to Settings > Privateness > Diagnostics & Comments. Within the “Diagnostic information” segment, you’ll be able to make a choice from two ranges of diagnostic information to be accrued. Word that there is no method to forestall Microsoft from accumulating diagnostic information completely. Listed here are your two possible choices:
- Required diagnostic information: This sends data to Microsoft “about your instrument, its settings and functions, and if it is appearing correctly.” If you are nervous about your privateness, that is the surroundings to select.
- Non-compulsory diagnostic information: This sends the entire 9 yards to Microsoft: It’s going to ship data about the internet sites you browse and the way you utilize apps and contours, plus more information about instrument well being, instrument utilization, and enhanced error reporting.” It additionally sends alongside required diagnostic information. If you are nervous about your privateness, do not make this selection.
 IDG
IDGCross right here to keep an eye on what diagnostic information Home windows 10 gathers. (Click on symbol to amplify it.)
Subsequent, scroll all the way down to the “Adapted reviews” segment and transfer the slider to Off. This may not have an effect on the information Microsoft gathers, however it’ll flip off centered advertisements and pointers which might be in line with that data. So whilst it may not support your privateness, you’ll be able to a minimum of minimize down at the annoyance issue.
Now scroll a little bit additional down and within the “Delete diagnostic information” segment, click on Delete. That can delete the entire diagnostic information Microsoft has accrued about you. Then again, after you delete it, Microsoft will get started accumulating the information once more.
After all in this display, believe scrolling as much as the “Enhance inking and typing” segment and shifting the slider to Off. That can forestall Home windows 10 from sending to Microsoft the phrases you enter the usage of the keyboard and inking.
One ultimate word about diagnostic information. You’ll have heard a couple of instrument Microsoft has been hyping, referred to as the Diagnostic Knowledge Viewer, which you’ll be able to obtain from the Microsoft Retailer. Microsoft claims it means that you can see precisely what sort of diagnostic information Microsoft gathers about you. Do not imagine it. It is one thing just a programmer may just love — or perceive. You will not be able to make use of it to obviously see the diagnostic information Microsoft collects. As a substitute, you’ll be able to scroll or seek via incomprehensible headings reminiscent of “TelClientSynthetic.PdcNetworkActivation_4” and “Microsoft.Home windows.App.Browser.IEFrameProcessAttached” with out a clarification of what it approach. Click on any heading, and you’ll be able to in finding much more incomprehensible information.
Use Microsoft’s Privateness Dashboard
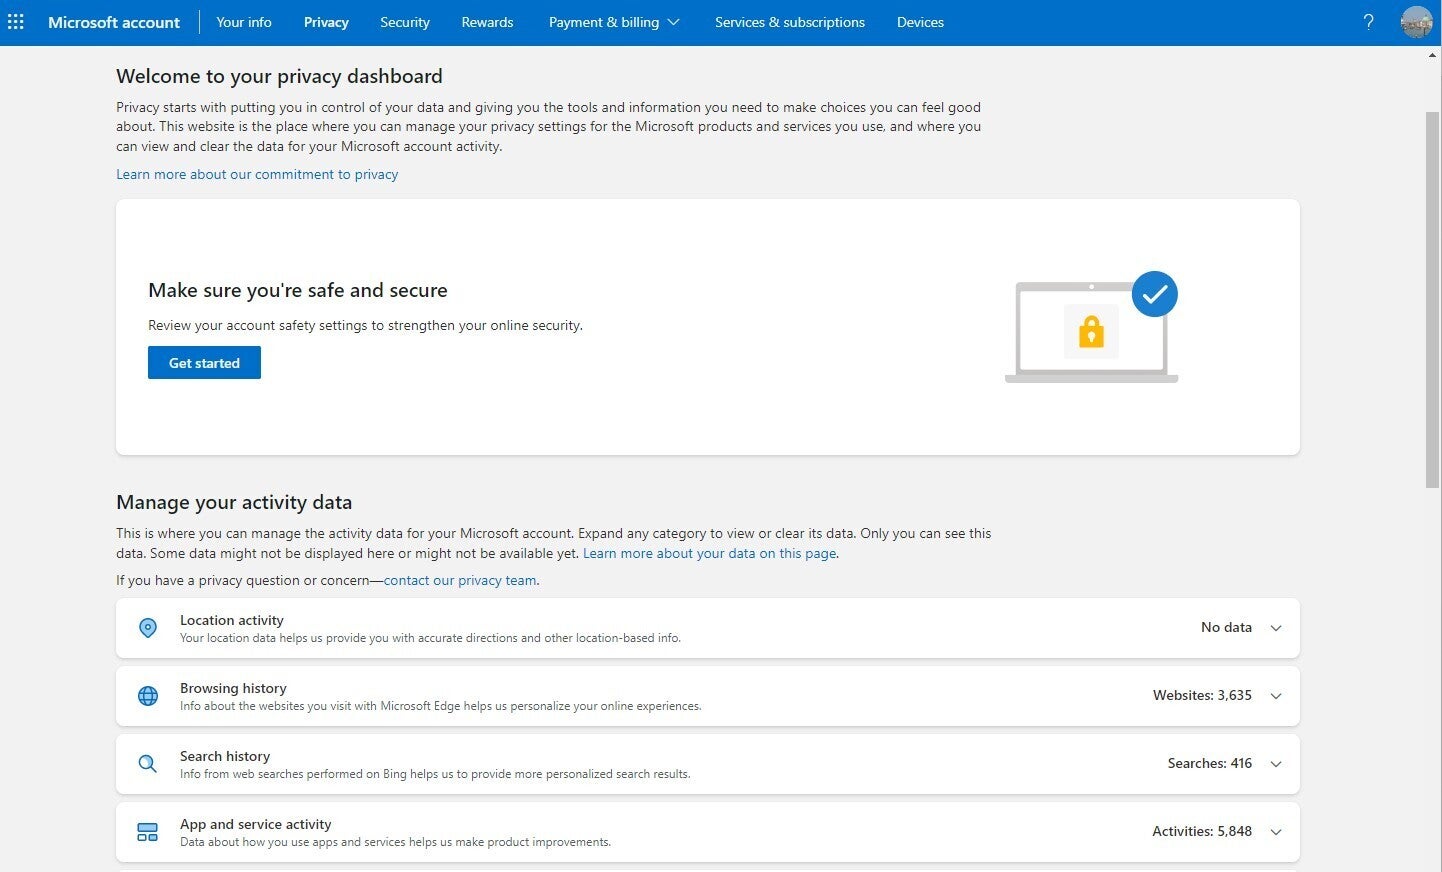
Microsoft has constructed a very good, little-known internet instrument referred to as the Privacy Dashboard that permits you to monitor and delete numerous data Microsoft gathers about you. As coated previous on this tale, right here you’ll be able to flip off advert concentrated on. You’ll additionally view and delete your surfing historical past, seek historical past, location process, voice process, media process, and extra.
(Word that to your surfing and seek historical past, it best tracks your process whilst you use Microsoft Edge or Web Explorer. It does not monitor information whilst you use different browsers, like Chrome or Firefox. And it best tracks your location historical past when you are the usage of Microsoft gadgets, no longer those who use iOS or Android.)
 IDG
IDGMicrosoft’s little-known Privateness Dashboard is a smart position to delete a lot of the guidelines Microsoft gathers about you. (Click on symbol to amplify it.)
To make use of it, head to the guidelines you wish to have to view and transparent, then click on the precise hyperlink — as an example, View and delete browser historical past in Microsoft Edge. Word that during some circumstances, you gained’t have complete keep an eye on over deleting and managing information.
Within the dashboard you’ll be able to additionally customise privateness settings for different Microsoft merchandise, together with Xbox, Workplace/Microsoft 365, and Microsoft Groups. Scroll to the “Privateness settings in our merchandise” segment and click on the product you are thinking about.
Get granular within the Settings app
All this mustn’t take that lengthy and can do a super deal to offer protection to your privateness. If you wish to dig even deeper into privateness protections, release the Settings app and click on Privateness. You’ll be able to see the similar Common pane that we coated within the first tip on this tale. Beneath the transfer to show off your promoting ID are 3 extra privateness settings you’ll be able to disable:
- Language listing: The listing of languages you’ve gotten enabled to your system is your individual industry.
- App launches: That is used to construct the “Maximum used” listing at the Get started menu and influences seek outcome order — most probably no longer vital for the privateness minded.
- Instructed content material: That is used, in Microsoft’s words, to “counsel new content material and apps chances are you’ll in finding attention-grabbing.” Consider me, it’s not likely you’ll in finding them attention-grabbing.
Flip all 3 of those off to additional offer protection to your privateness.
And there is a lot extra past the Common pane. At the left-hand facet of the display, you’ll be able to see further spaces the place you’ll be able to get much more granular about privateness — as an example, within the “Home windows permissions” segment you’ll be able to alternate your international privateness choices for issues reminiscent of speech popularity and inking. And this is the place you’ll be able to get get right of entry to to all app permissions, as defined previous on this article.
Guidelines for the in point of fact paranoid
If you wish to take privateness even additional, there are a couple of extra issues you’ll be able to do.
Prevent the usage of OneDrive
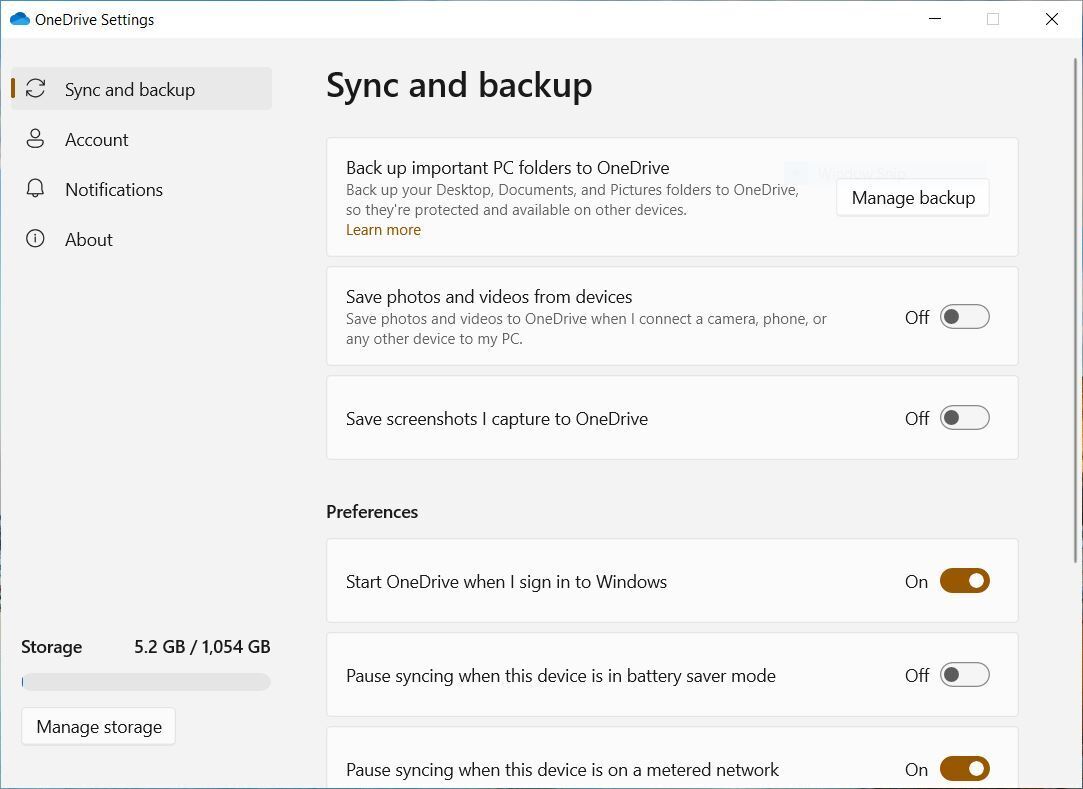
If you do not like the theory of syncing your information to Microsoft’s OneDrive cloud garage provider, you’ll be able to forestall the usage of it. (There is not any method to uninstall it.) Proper-click the OneDrive icon at the notification tray on the backside proper of the Home windows desktop and make a choice Settings from the menu that pops open. Within the OneDrive Settings window, move to the Account tab, then click on the Unlink this PC button. Subsequent, click on the Sync and backup tab and uncheck Get started OneDrive after I check in to Home windows.
 IDG
IDGTransfer the slider subsequent to “Get started OneDrive after I signal into Home windows” to Off. (Click on symbol to amplify it.)
Do not sync Home windows settings throughout gadgets
As well as, you’ll be able to say no to syncing your Home windows settings amongst other gadgets. While you sync your settings, the way in which you’ve custom designed and arrange Home windows 10 will probably be synced to Microsoft’s servers. If you wish to flip it off, move to Settings > Accounts > Sync your settings and switch off the transfer underneath Sync settings.
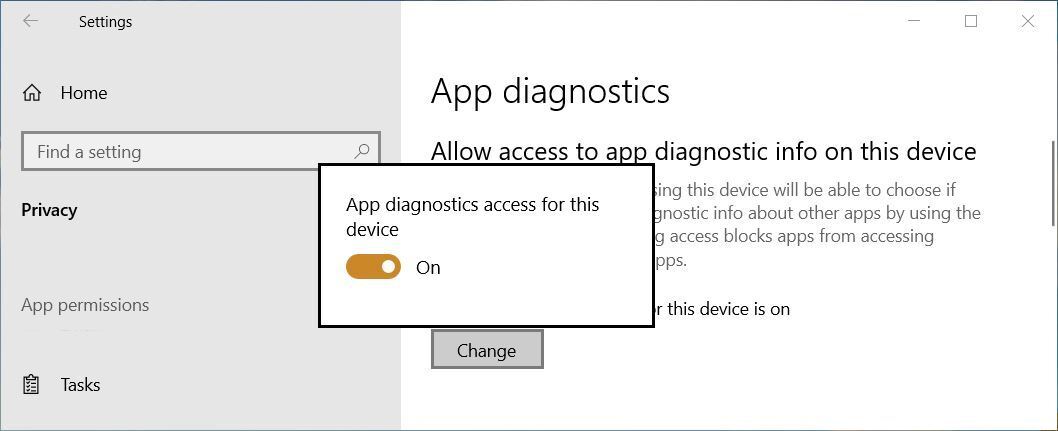
Flip off app diagnostics
Converting this surroundings is not a specifically large privacy-enhancer, however if you are an actual privateness fiend, each and every bit is helping. It does not have an effect on desktop apps like Phrase or Excel, and as a substitute goals integrated Home windows apps and the apps you obtain from the Microsoft Retailer. Turning off app diagnostics stops any of the ones apps from getting information about different apps — issues reminiscent of their inside names, package deal names, the consumer title of the individual working the app, and techie main points reminiscent of reminiscence utilization. Builders use this data at all times, however your garden-variety apps mustn’t want any of it.
To show it off, make a choice Settings > Privateness > App diagnostics, and within the “Permit get right of entry to to app diagnostic data in this instrument” segment, click on Trade. When a slider seems, transfer it to Off.
 IDG
IDGFlip off app diagnostics to forestall integrated Home windows apps and Microsoft Retailer apps from getting information about different apps. (Click on symbol to amplify it.)
Do not percentage Home windows updates
After all, you’ll be able to alternate the way in which Home windows updates. In Settings > Replace & Safety > Supply Optimization, flip off the transfer subsequent to Permit downloads from different PCs. When grew to become on, this serve as shall we your Home windows 10 gadget percentage its replace information with different Home windows 10 computer systems on the web via peer-to-peer distribution.
Those steps can take you far against ensuring that Home windows 10 does not move the road into accumulating information you would want stay non-public.
This newsletter used to be initially printed in January 2016 and maximum lately up to date in November 2022.
Extra privateness pointers:
Copyright © 2022 IDG Communications, Inc.