

QuickTime Starter Equipment
AppleInsider might earn an associate fee on purchases made via hyperlinks on our website.
Apple’s QuickTime is a 30-year-old generation however continues to be supported via Apple. This is tips on how to use the QuickTime Participant integrated with macOS.
Historical past
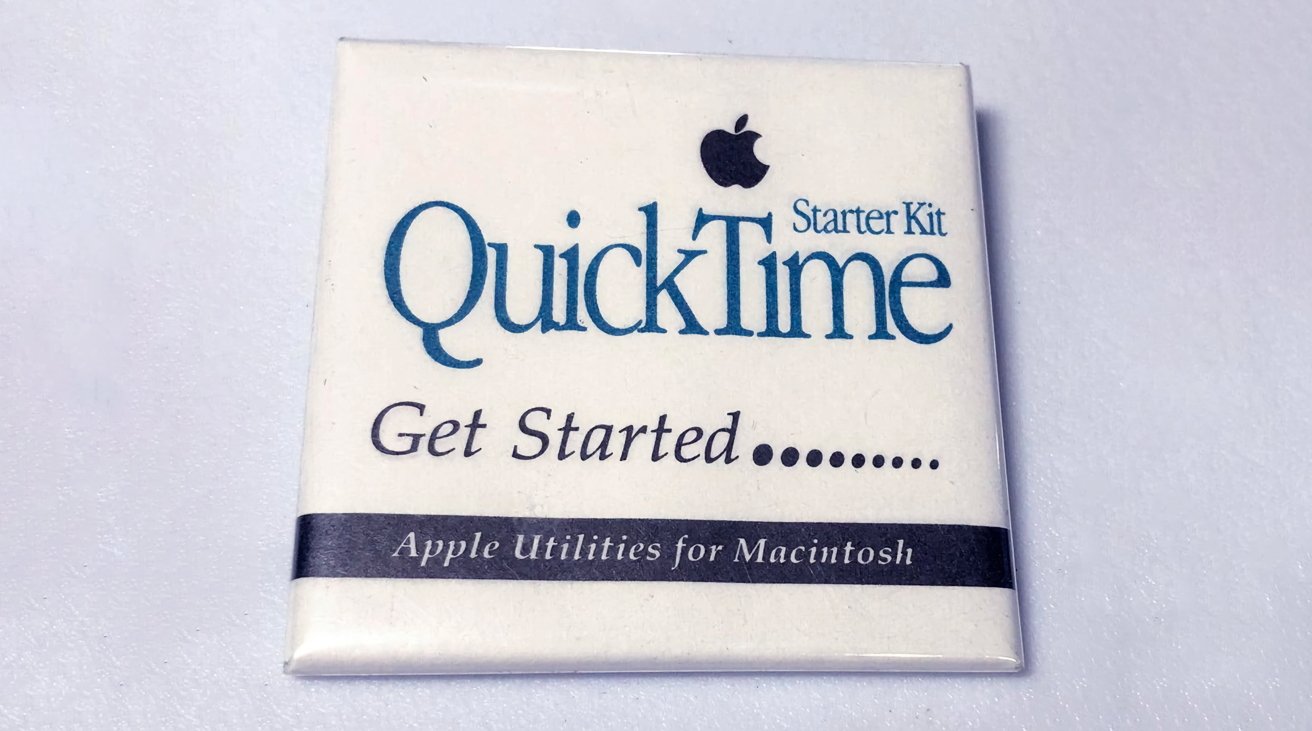
Prior to the web, and lengthy ahead of streaming, there was once QuickTime. Launched via Apple in 1992, it was once a innovative generation on the time that equipped timed recording and playback of audio-visual knowledge. QuickTime (or “.mov”) recordsdata had been used to move movies throughout computer systems.
The early QuickTime participant was once rudimentary – black and white controls, tiny playback home windows, and restricted colour intensity. AV compression was once equipped via plug-in QuickTime elements. Every codec has an figuring out 4-character code, and the unique Apple QuickTime codec had (and nonetheless has) a code of ‘.mov’.
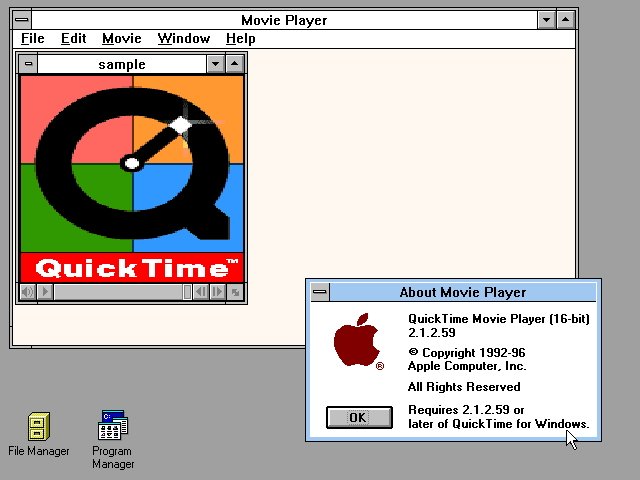
A couple of years later, Apple launched a model for Home windows.
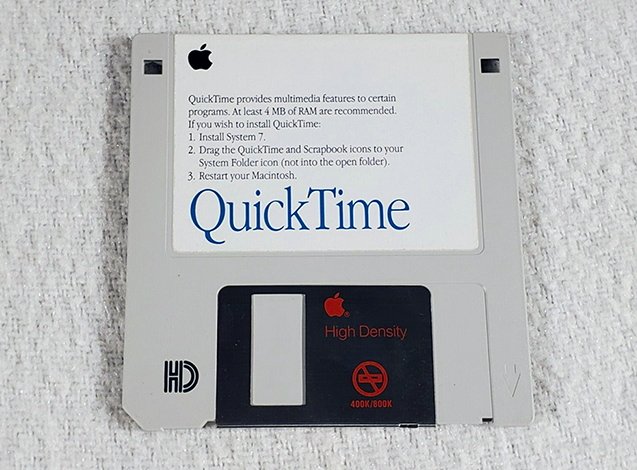
Early variations of QuickTime for Mac had been additionally launched on 3.5″ floppy disk.
A bunch of third-party QuickTime-based modifying apps gave the impression, with probably the most notable being Adobe Premiere. Premiere lives on these days in Premiere Pro from Adobe’s Inventive Cloud.
When Apple launched Mac OS X in 2000, it integrated a brand new, modernized participant app with a bigger window, extra options, and advanced formats. It additionally launched a streaming server that allowed the devoted streaming of QuickTime films over the web.
The usage of Lately’s QuickTime Participant
Lately, Apple nonetheless ships QuickTime Participant with macOS, even supposing the .mov document layout is not being actively advanced at Apple – it’s been outdated via the MP4, H.264, and H.265/HEVC codecs.
QuickTime Participant follows Apple’s minimalist design sense and lets in fundamental video/audio modifying purposes in the primary participant window. It additionally allows exporting recordsdata to a couple different AV codecs and the sharing of recordsdata. There is additionally a display recording function – a quite new addition to the participant.
You’ll additionally full-screen a participant window and use it to observe films and TV displays. In case your Mac has an inner digital camera, or you may have an connected digital camera in a position to video recording, you’ll additionally file new films and save them to recordsdata.
Should you plug in an iOS software equivalent to iPhone or iPad by means of a USB cable, you’ll additionally use it as a digital camera to file films from.
Elementary Use
The participant’s fundamental options are opening, saving, exporting, and copy-and-paste. There also are the standard usual document instructions: Open, Shut, and Save.
Should you grasp down the Possibility key whilst the Document menu is open, Shut adjustments to Shut All, which closes all open film home windows. There could also be an Open Location… possibility (from a URL), Open Symbol Collection… (for QuickTime Symbol codecs), and Open Fresh.
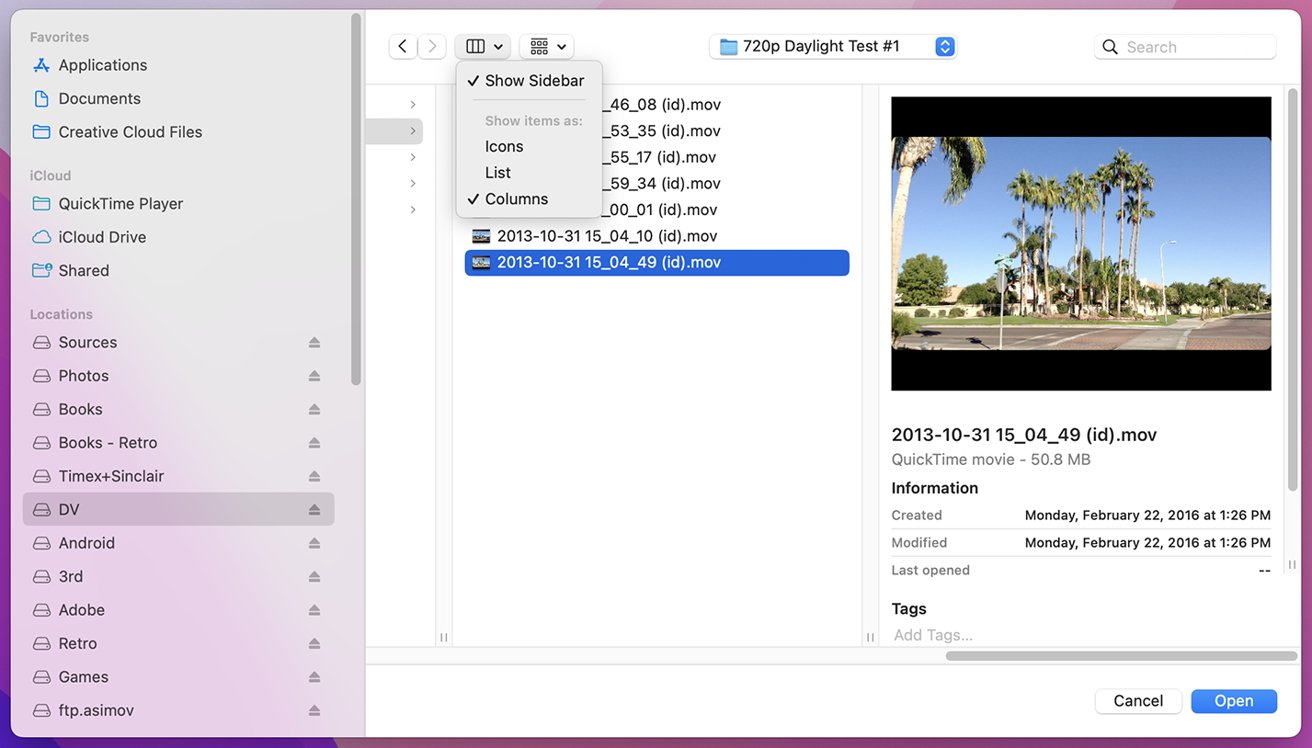
Settling on Open… shows the usual macOS Open conversation, however should you click on at the small button within the higher left nook with 4 squares on it and make a selection “Columns” from the popup menu, the window switches to NeXT-style Columns mode, which shows a nonetheless film preview at the correct for the chosen film.
You’ll additionally Replica, Rename, and Transfer To from the Document menu. Replica opens an similar unsaved window which you’ll identify within the window’s name bar. If you choose Rename from the Document menu on an current film window, you’ll rename a stored document in the similar means.
Transfer To… supplies a small window with an inventory of garage locations the place you’ll transfer a document. Then again, solely top-level locations are to be had – it is not a normal open or save window.
Export As… permits you to export to a small collection of codecs equivalent to 480p, 720p, 1080p, 4K, or audio solely. The Percentage… menu merchandise beneath allows you to ship a film to AirDrop, Notes, Messages, or to YouTube if in case you have an account.
At the View menu, there are instructions for:
- Making a film window fullscreen
- Making it glide above all different home windows
- Zooming in or out
- Converting film pace
- Switching language audio tracks
- Turning subtitles off and on
- Converting the time layout show
- Leaping ahead or again a bankruptcy
- Show not obligatory audio tracks (if any)
- and loop
The time layout choices mean you can show time in SMPTE timecode layout – the usual utilized by skilled video editors and maximum video modifying instrument. You’ll additionally leap to a particular SMPTE time in a film, if it incorporates a timecode monitor.
In case you are the usage of a contemporary Apple keyboard, you’ll additionally make the frontmost film window Input Fullscreen via urgent the “fn”+F keys without delay. The “fn”, or serve as key’s at the decrease left nook of the Apple keyboard with a globe image on it. Urgent fn+F once more exits fullscreen mode.
At the Window menu are quite a lot of instructions, together with same old Window menu instructions equivalent to Reduce, Zoom, Transfer To Constructed-In Retina Show in case you are the usage of an exterior show, There is additionally Have compatibility to Display, Fill Display, Panoramic, Build up and Lower Measurement (Command-[, Command-] respectively), and Display Film Inspector and Display Export Development.
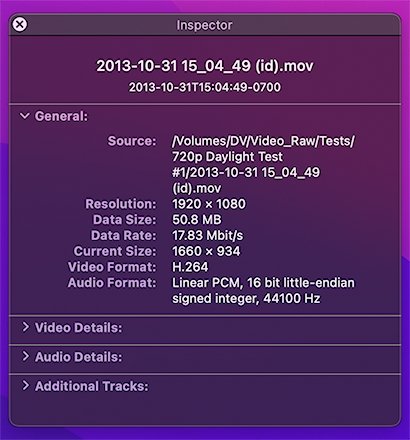
Settling on “Display Film Inspector” brings up a small inspector window containing 4 panes of information concerning the frontmost film:
Participant Window Controls
Be aware that to show window controls, you should hover the Mac’s cursor over a QuickTime participant window. Should you mouse out of the window’s barriers, the controls are hidden.
Elementary participant window controls come with a scrubber on the backside, a quantity slider, play and search ahead/again controls, time counters, an AirPlay sharing keep an eye on, Image-In-Image button, and a sharing and playback pace popup menu keep an eye on:
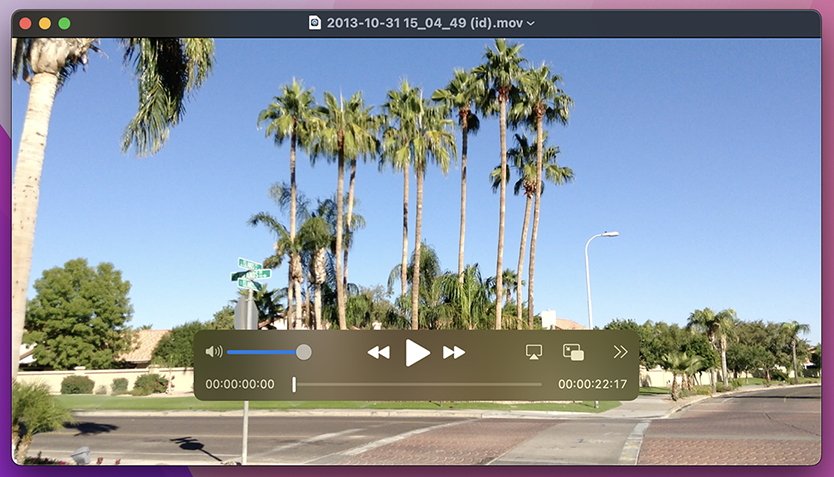
You’ll additionally scrub ahead or backward 1 2nd at a time via urgent the suitable or left arrow at the keyboard.
Clicking the AirPlay button displays a popup menu of all TV units inside of vary that give a boost to wi-fi AirPlay sharing. Those can come with some Third-party TVs in addition to the Apple TV.
To the suitable of the AirPlay keep an eye on is Image-In-Image (PiP), and clicking it sends the frontmost film window to the higher correct nook of the display, the place it is going to hover above all different home windows. Should you hover the mouse over the PiP window, 3 controls are displayed: an in depth button, a Play button, and any other PiP button which exits PiP mode when clicked.

Clicking the some distance correct keep an eye on (with 2 right-pointing arrows) pops up the Percentage and Playback Velocity menus.
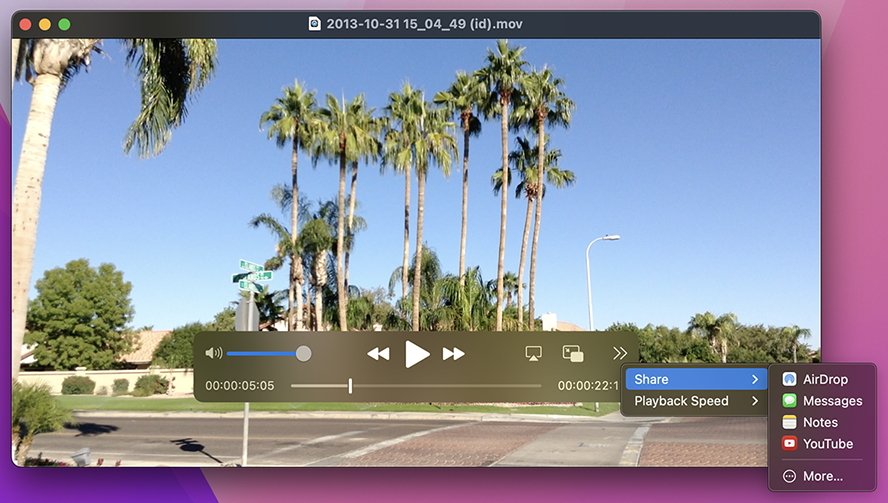
The Percentage menu pieces are necessarily the similar as at the Document menu’s Percentage… menu, however with a “Extra…” possibility which opens a window to percentage content material with any sharing extensions, if put in.
Clicking a film window’s inexperienced (Third) button within the higher left nook additionally toggles Fullscreen mode. As soon as in fullscreen, to go out, you’ll be able to wish to hover the cursor to the higher left nook of the show to turn the window titlebar once more to get get entry to to the keep an eye on.
Recording
You’ll additionally make an audio-only recording.
To start out recording, make a selection Document then New Film Recording or Document then New Audio Recording. A recording window will seem with a are living circulation from the default digital camera (most often the integrated “iSight” digital camera for Macs). The file button is within the middle of the window.
Should you click on the small down-pointing arrow subsequent to the Document button, a bunch of recording choices might be displayed on a popup. The highest phase is which connected digital camera you need to file from, the following phase is which audio enter to file from, and the following phase is for display recording, which we will get to subsequent.
Be aware that iOS units on Apple’s unsupported legacy software listing is probably not indexed below the Digital camera or Microphone sections, even supposing display recording from them might nonetheless be to be had. As of macOS 13 Ventura, solely iPhone 7 and later fashions are supported.
Additionally be aware that you’ll file video and audio enter independently from other units. This lets you seize video from an iPhone or iPad, as an example, whilst the usage of an exterior mic equivalent to a USB podcasting mic or an exterior Bluetooth wi-fi mic.
On the backside of the popup menu is a seize high quality menu phase which has choices relying on what sort of software you are recording from.
Click on the Document button to begin recording, and click on it once more to forestall recording. After recording stops, the file window will shut and your new film will open in a normal film playback window.
Remember to save the film to a document in an instant to steer clear of knowledge loss.
Display Recording
You’ll additionally file an Apple software display, even supposing in QuickTime Participant, doing so is a bit more fragmented relying on which software you need to file from. If you wish to file from an exterior software equivalent to iPhone/iPad or from a close-by Apple TV, the recording choices are indexed at the identical file popup menu as proven above.
To start out a display recording from an iPhone/iPad or Apple TV, observe the pattern steps discussed above, however as a substitute of settling on a “Digital camera” on the peak of the popup menu, make a selection a tool from the “Display” phase beneath it. If the software is an iOS software it should be attached for your Mac by means of a USB cable.
On settling on the software from the “Display” listing, the recording window will exchange to turn the software’s display as a substitute of digital camera enter.
If you choose an Apple TV from the Display listing at the recording popup, it is going to first show a 4-character code at the Apple TV’s show after which instructed you to go into it for your Mac.
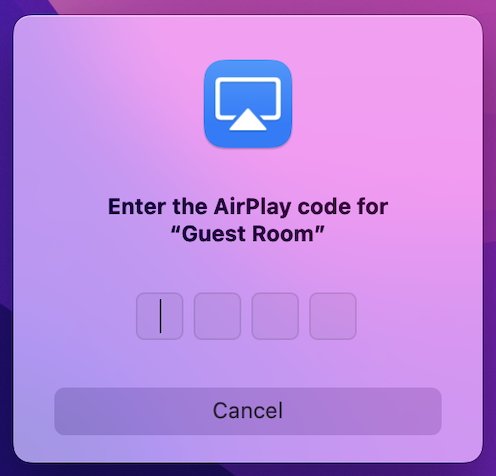
That is to stop unauthorized other people from recording out of your Apple TV with out your wisdom. All AppleTV recording is finished over AirPlay, so that you should have AirPlay became on on your Apple TV’s Settings app.
Recording Your Mac’s Desktop
If you wish to make a display recording of your Mac’s desktop in QuickTime Participant, make a selection New Display Recording from the Document menu. A resizeable marquee area will seem for your Mac’s desktop together with a small keep an eye on panel beneath it.
You’ll resize/transfer the marquee space to seize any area of your display you want via dragging the resize handles on the marquee edges or via dragging the marquee via clicking and dragging in its middle.
Within the file keep an eye on panel which seems, there are 5 buttons at the left: Seize Whole Display, Seize Window, Seize Decided on Portion, Document Whole Display, and Document Decided on Portion.
There is additionally an Choices button with Save To, Timer, Microphone, and Choices sections. On the some distance correct is the Document button.
The three “Seize” choices are actually from the Mac’s screenshot function, which lets you seize stills of your Mac’s display.
To go out marquee mode and go back to the Mac desktop, hit the Get away key for your Mac keyboard, or click on the file keep an eye on panel’s shut button at the left.
After the recording has stopped, the brand new recording might be despatched to no matter menu merchandise you decided on within the Save To phase of the Choices menu.
Enhancing
Maximum modifying in QuickTime Participant is managed from the Edit menu or within the participant window itself.
There are 2 major tactics to begin modifying: make a selection both the “Trim” (Command-T) or Upload Clip To Finish menu choices from the Edit menu.
You’ll rotate the film in 90-degree increments or turn it horizontally or vertically. You’ll additionally take away both all video tracks or all audio tracks the usage of the “Take away Video” and “Take away Audio” menu pieces.
As soon as you choose “Trim” from the Edit menu, a easy Trim pane with “Trim” and “Cancel” buttons seems. You’ll trim the beginning or finish of the clip via dragging the trim keep an eye on’s ends, then clicking the Trim Button.
As soon as the Trim keep an eye on has been resized, you’ll slide it ahead or again around the film via conserving down the Command key and dragging both of its handles on all sides:
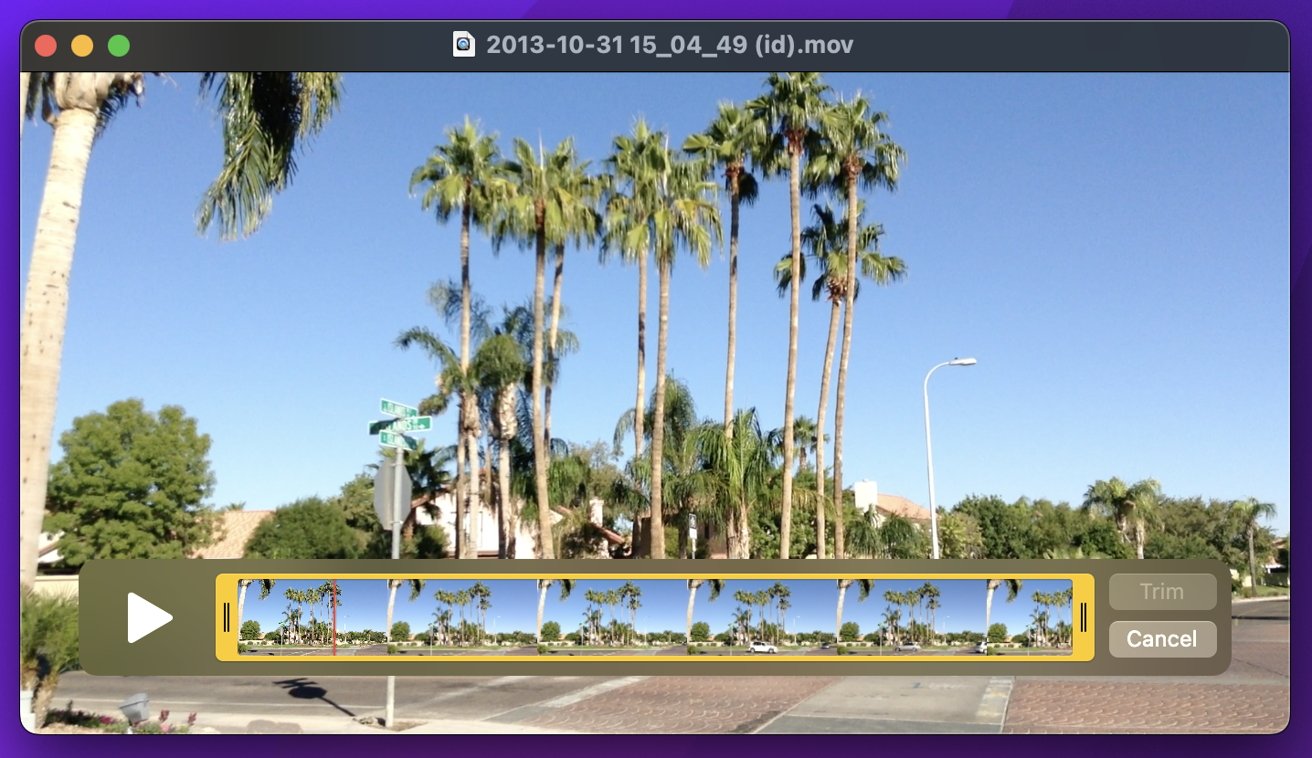
Should you click on anyplace within a clip whilst the usage of the Trim keep an eye on, a playback head place keep an eye on seems. Should you click on the Play button, playback starts from the top’s present place.
To go out the Trim keep an eye on, press the Cancel button.
Settling on Cut up Clip (Command-Y) from the Edit menu splits the clip for modifying into more than one segments – one each and every time you choose the menu merchandise. As soon as break up, double-click anyone section within the Cut up keep an eye on to re-enter the Trim keep an eye on.
Should you click on the Trim or Cancel button, you are returned to the Cut up keep an eye on. Should you click on the Achieved button from the Cut up keep an eye on, you are taken again to the primary film window.
Whilst in Cut up mode, if you choose one of the vital break up film segments, the “Insert Clip at Finish” command turns to Insert Clip After Variety – which lets you insert a completely other film from any other document.
Be aware that the Cut up Clip command solely permits you to reduce, reproduction, paste or delete whilst in Cut up mode: it does not if truth be told create a brand new clip or film window after splitting.
Streaming
Apple additionally launched a desktop Mac OS X app referred to as QuickTime Broadcaster which allowed customers to simply broadcast QuickTime films on the net:

But if web usual RFC 8216 (HTTP Live Streaming) was once launched via the IETF in 2009, Apple temporarily followed it and dropped give a boost to for QSS and Darwin Streaming Server.
Lately Apple absolutely helps HTTP Live Streaming (HLS), however the encoding gear and server setup require the usage of the Terminal.
Despite the fact that QuickTime Participant is going long ago, it nonetheless supplies easy manipulation of recent and legacy media. In conjunction with Apple’s HLS generation, it is relatively simple to play, file, and edit media and arrange a fundamental streaming server.